PowerBI With Neo4j – How do you build a DataConnector?
TL;DR;
Repo is at: https://github.com/cskardon/Neo4jDataConnectorForPowerBi
Release at: https://github.com/cskardon/Neo4jDataConnectorForPowerBi/releases
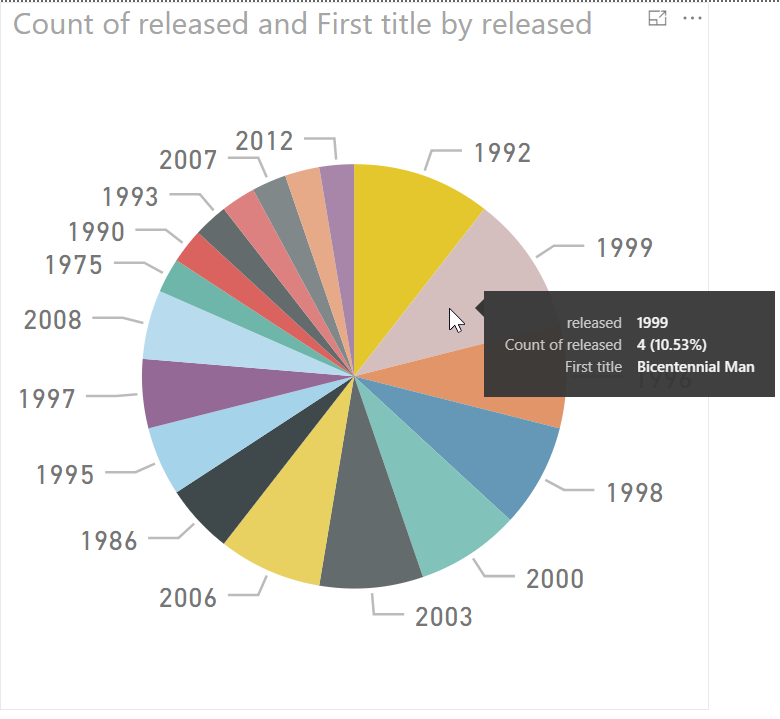
Looky! Pie Charts!
This glorious picture represents the very pinnacle of my PowerBI experience, beforehand I was pulling the data into Excel and charting myself – no longer!
Jokes aside, the big news here is that I’ve dramatically improved upon my previous post where I showed how you could connect to a security enabled Neo4j instance from PowerBI by generating your own base64 encoded string. All in all, that’s a terrible approach, sure – it works, but it’s not really manageable for any real use.
Writing a Power BI data connector.
There are a few guides on this, I found the Microsoft repo on github for Data Connectors to be super handy. In essence you write them in ‘M Power Query’ which is Power BI’s query language of choice. I opted to write my connector in Visual Studio – so went and got the Power Query SDK extension.
The nice thing about this is that it allows me to test my connector without needing to constantly start/stop PowerBI. So! We get that installed and create a new Data Connector project:
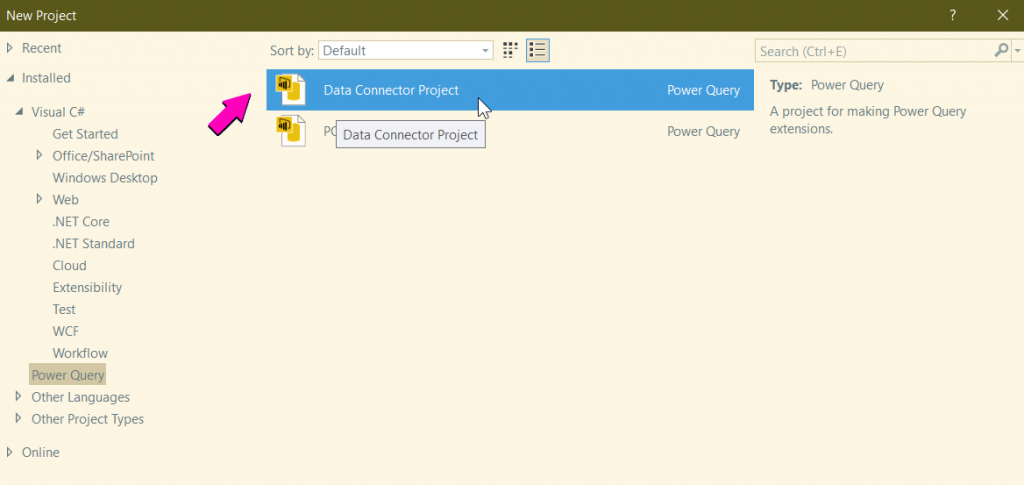
This gets you a new Data Connector project with two files that you’ll initially care about, a .pq file and a .query.pq file. The latter being a ‘unit test’ file. Let’s first look at the .pqfile.
.PQ
A .pqfile is simply a PowerQuery file, it’s written in M and if you’re a PowerBI specialist – I assume that’s all good – for a non-PowerBI user (me) it means learning some stuff.
So, if you just F5 the project you should get a swirly thing, followed by an error saying credentials are needed.
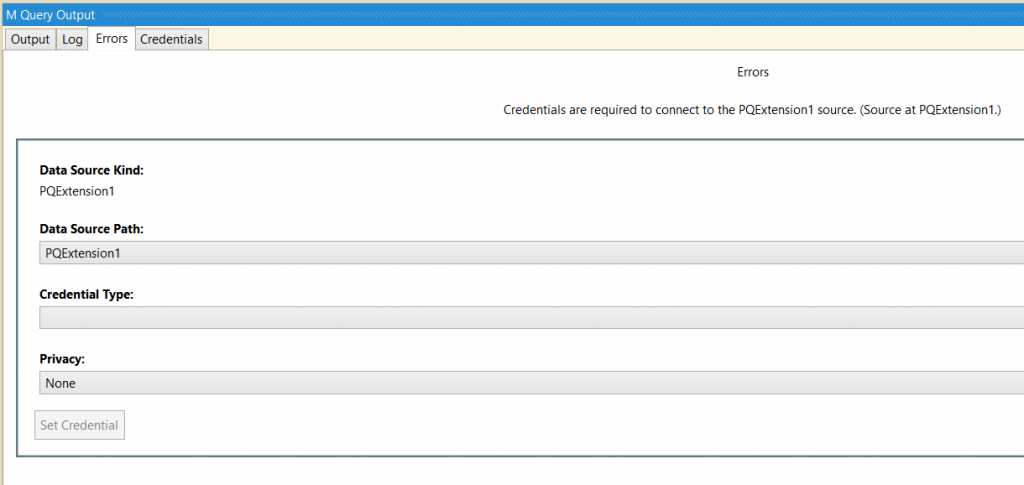
Select ‘Anonymous’
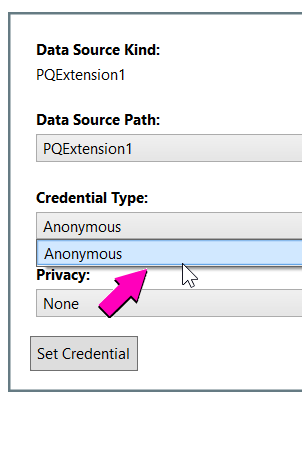
Then press ‘Set Credential’ – then press F5 again – results!
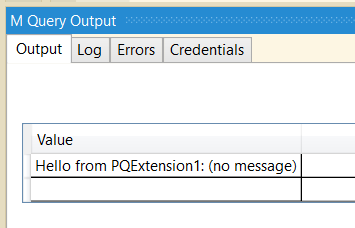
OK, so what did we actually run when we pressed F5? Remember the .query.pqfile? That is executing the Contents() query on the default connector.
let
    result = PQExtension1.Contents()
in
    result
OK, so far so – hum drum. This is really to get you used to the Power BI development experience. The good news is that we can just copy / paste from the old post I did and we can have a working function – taking into account that (a) we have the same data (movies DB) and the same user pass (neo4j/neo).
[DataSource.Kind="PQExtension1", Publish="PQExtension1.Publish"]
shared PQExtension1.Contents = () =>
let
    Source =
        Json.Document(
            Web.Contents("http://localhost:7474/db/data/transaction/commit",
            [
                Headers=[Authorization="Basic bmVvNGo6bmVv"],
                Content=Text.ToBinary("{""statements"" : [ {
                        ""statement"" : ""MATCH (tom:Person {name:'Tom Hanks'})-[:ACTED_IN]->(m)<-[:ACTED_IN]-(coActors), (coActors)-[:ACTED_IN]->(m2)<-[:ACTED_IN]-(cocoActors) WHERE NOT (tom)-[:ACTED_IN]->(m2) RETURN cocoActors.name AS Recommended, count(*) AS Strength ORDER BY Strength DESC""} ]
                        }")
            ])),
    results = Source[results]
in
    results;
You should get results saying: [Record]which is what you have, if you get that – you have successfully connected to Neo4j! Good job! Now, first things first, let’s strip out the Authorization header and auto generate that.
Authorization
We have two forms, anonymous and user/pass. For anonymous, we don’t want to send the header, for user/pass – we obviously do. Let’s start with user/pass as we’re already there.
So let’s add another function, it’ll generate the headers for us, let’s firstly hardcode it:
DefaultRequestHeaders = [
    #"Authorization" = "Basic " & Binary.ToText("neo4j:neo")
];
Changing our function to be:
[DataSource.Kind="PQExtension1", Publish="PQExtension1.Publish"]
shared PQExtension1.Contents = () =>
let
    Source =
        Json.Document(
            Web.Contents("http://localhost:7474/db/data/transaction/commit",
            [
                //Change HERE vvvvv
                Headers=DefaultRequestHeaders,
                Content=Text.ToBinary("{""statements"" : [ {
                        ""statement"" : ""MATCH (tom:Person {name:'Tom Hanks'})-[:ACTED_IN]->(m)<-[:ACTED_IN]-(coActors), (coActors)-[:ACTED_IN]->(m2)<-[:ACTED_IN]-(cocoActors) WHERE NOT (tom)-[:ACTED_IN]->(m2) RETURN cocoActors.name AS Recommended, count(*) AS Strength ORDER BY Strength DESC""} ]
                        }")
            ])),
    results = Source[results]
in
    results;
Pressing F5 will connect and get the same result. So – we know we can do the base64 conversion in PowerBI – this is good. But, still – not ideal to have usernames and passwords hardcoded – for some reason. So let’s let PowerBI get us a user/pass.
Navigate to the ‘Data Source Kind description’ section and UsernamePassword there:
// Data Source Kind description
PQExtension1 = [
    Authentication = [
        // Key = [],
        UsernamePassword = [],
        // Windows = [],
        Implicit = []
    ],
    Label = Extension.LoadString("DataSourceLabel")
];
You can add things like ‘UsernameLabel’ in there if you want (I have, but for the purposes of this – I’m not gonna bother) – they make it look pretty for the PowerBI people out there 🙂
OK, when you connect now (you might have to delete your credentials – the easiest way being selecting the ‘Credentials’ tab in the M Query Output window and ‘Delete Credential’) you will be able to select User/Pass as an option
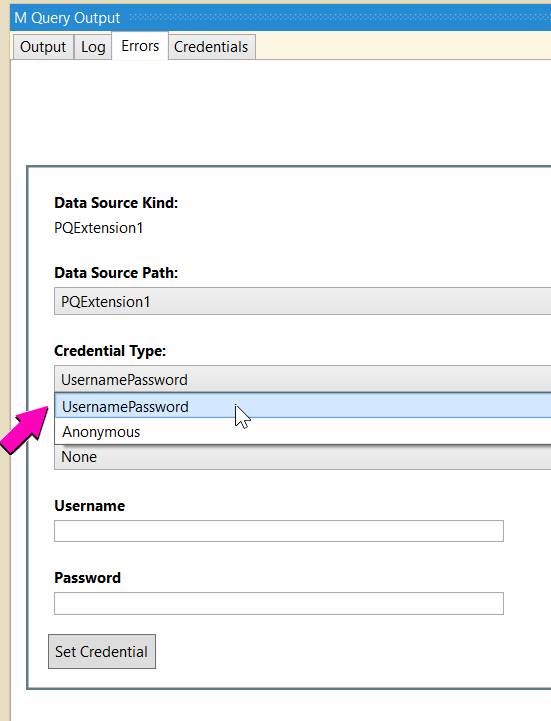
But hey! We’re not actually using it yet! So let’s get the values from PowerBI using a handy function (that is really hard to find out about) called: Extension.CurrentCredential() with which we can get the username / password, so let’s update our DefaultRequestHeaders to use it:
DefaultRequestHeaders = [
    #"Authorization" = "Basic " & Neo4j.Encode(Extension.CurrentCredential()[Username], Extension.CurrentCredential()[Password])
];
OK, the dream is alive! For anonymous, basically we want to remove the headers, to do that we need to check what type of authentication is in use, and we’re back to the hilariously undocumented Extension.CurrentCredential method again:
Headers = if Extension.CurrentCredential()[AuthenticationKind] = "Implicit" then null else DefaultRequestHeaders,
We look for ‘Implicit’ as that’s what Anonymous is – with this we set the Headers to null if we’re anonymous, and the headers if not – ACE!
Getting Stuff
The crux of the whole operation, now we’re able to connect with user/pass and anonymous, it’s probably time we dealt with the hardcoded Cypher. Let’s take in a parameter to our method:
[DataSource.Kind="PQExtension1", Publish="PQExtension1.Publish"]
shared PQExtension1.Contents = (cypher as text) =>
let
    Source =
        Json.Document(
            Web.Contents("http://localhost:7474/db/data/transaction/commit",
            [
                Headers=DefaultRequestHeaders,
                Content=Text.ToBinary("{""statements"" : [ {
                                //Change HERE vvvvv
                        ""statement"" : "" " & cypher & " ""} ]
                        }")
            ])),
    results = Source[results]
in
    results;
Excellent, now we need to change our query.pqfile to call it:
let
	result = PQExtension1.Contents("MATCH (n) RETURN COUNT(n)")
in
	result
F5 and see what happens – now we’re passing Cypher to the instance, and getting back results.
This largely covers how to build your own connector, if you look in the source code (and I encourage you to – it’s only 156 lines long including comments) – in it you’ll see I’ve abstracted out some of the stuff we’ve done here, named things properly, and I also pull in the address, port and scheme to allow a user to set it.
FYI, if the web source supports standard Basic and Anonymous auth, you don’t need to do any coding to support it. The underlying web connector will automatically apply Basic auth for UsernamePassword credential type and Anonymous for Anonymous.
Hmm, as far as I’m aware, it does that via the age old technique of scheme://user:pass@url – which doesn’t work with Neo4j as you need to pass it in base64 encoded in the headers.
[…] Chris Skardon has written a blog post explaining how to build your own Neo4j PowerBI Data Connector. […]